Hobson Web Console
- Daniel Noguerol
Note: The Hobson logo is finalized and will not be changed.
When the user initially enters the Hobson web console application, they are provided the Login screen shown in figure 1 below:
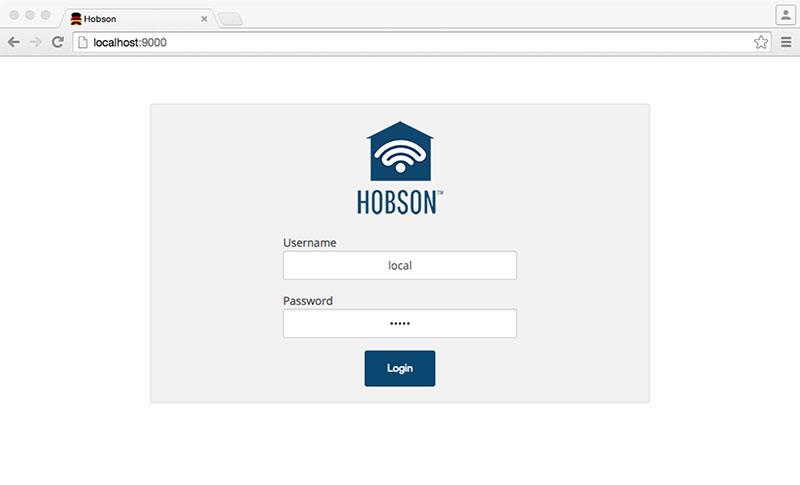 Figure 1
Main Dashboard
Entering credentials and clicking the "Login" button takes them to the Main Dashboard screen shown in figure 2 below:
 Figure 2
The dashboard screen is currently broken up into several components. The navigation bar has the following items (as shown by the red letters in figure 2):
Item A - A picture of the home that the user has currently selected – Hobson also refers to a home as a "Hub" (the two terms are synonymous).
Item B - A combo box that shows the currently selected hub and allows the user to switch to a different Hub (if they have more than one).
Item C - A cog button that takes the user to the Hub Settings screen for the currently selected Hub.
Item D - A hamburger button that opens/closes the Activity Log drawer.
Below the navigation bar are a number of device tiles that represent all the smart devices that the currently selected Hub knows about. Each tile shows the state of the device (for example, the Color LED Bulb is on and the Front Door camera is showing the last camera snapshot).
If the user clicks on the upper section of a device tile (where the icon or image resides), the device state will change in some way. For example, clicking the Color LED Bulb icon will turn the light off. Clicking the Front Door image will cause the image to refresh with the most recent camera snapshot.
Clicking the bottom section of a device tile (where the device name and 'i' icon reside) will take the user to a screen where they can access detailed device controls and change settings associated with the device. That capability has yet to be developed.
Activity Log
Clicking the hamburger icon (item D in figure 2) will open the Activity Log drawer shown in figure 3 below:
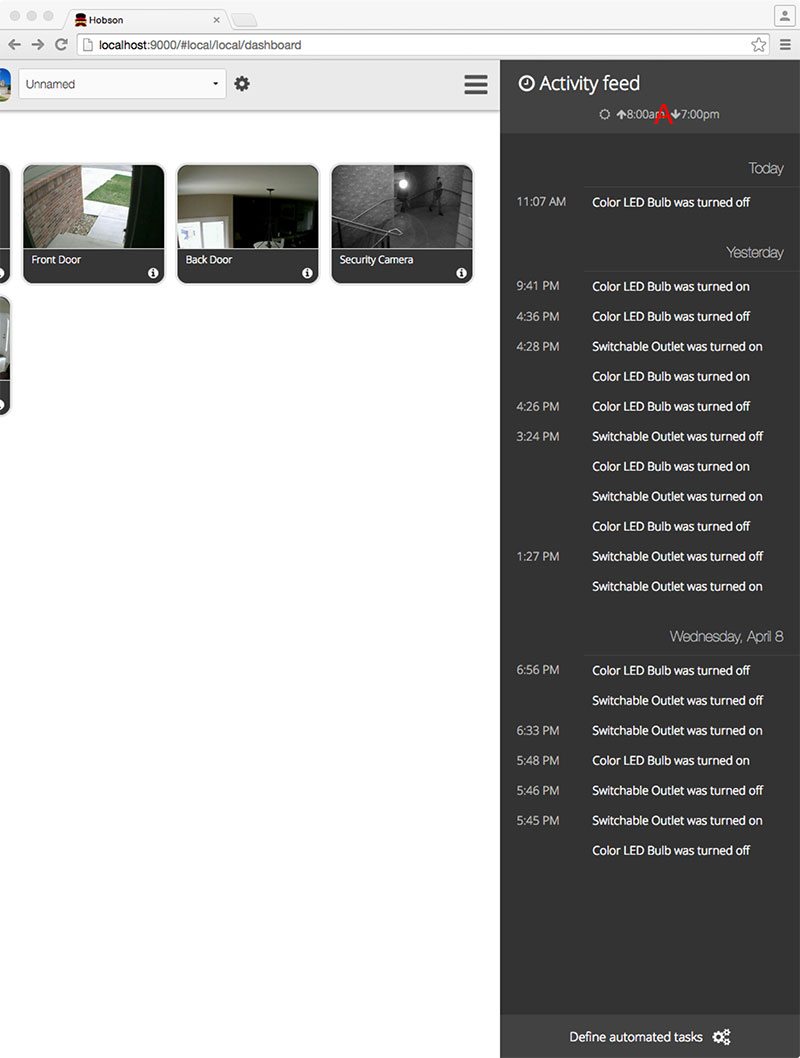
Figure 3
The activity log shows the most recent activity that has occurred in the home.
It also shows the sunrise/sunset times for the current day (item A in figure 3) if the user has provided their address when they set up the system. This needs to be improved (TBD).
Hub Settings
Clicking the hamburger button in the navigation bar (item C in figure 2) will open the Hub Settings page shown in figure 4 below:
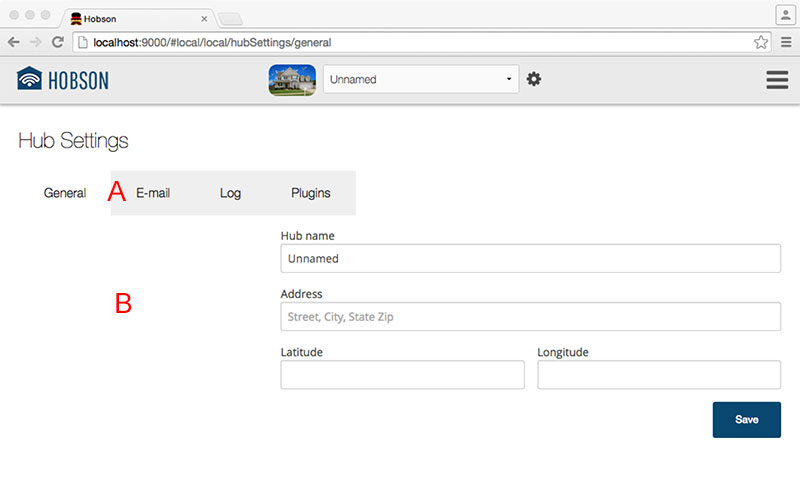 Figure 4
The Hub Settings pages are broken up with tabs (item A in figure 4) – General, E-mail, Log and Properties. The General tab is selected by default. Note that the tabs do not have any skinning applied yet (TBD).
Hub Settings - General
The General tab of Hub Settings allows the user to set:
- The name of the hub – this is what appears in the navigation drop box (item B in figure 2).
- The address of the hub
- The latitude and longitude of the hub
Item B in figure 4 is a space for a map to visually represent the address that has been entered. In figure 4, no address has been entered so item B needs to show an indicator that the user needs to enter an address (TBD).
If the user enters an address, a map is shown and the latitude/longitude fields are automatically populated as shown in figure 5 below:
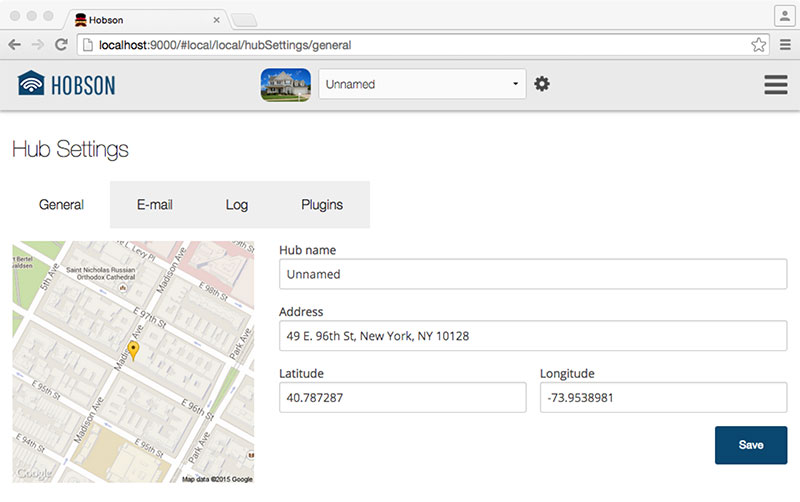
Figure 5
Hub Settings - Email
The E-mail tab of Hub Settings allows the user to enter their e-mail account information a shown in figure 6 below:
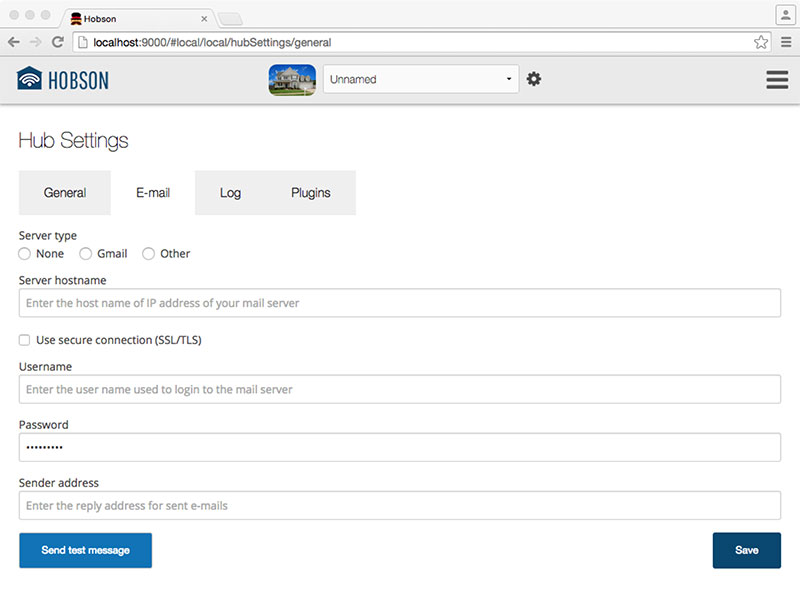
Figure 6
This page allows the user to:
- Select the type of e-mail server (Gmail or Other)
- Enter the server host name
- Indicate whether the connection to the server is secure or not
- Enter their e-mail account username
- Enter their e-mail account password
- Enter the reply-to address to use for e-mails the system sends out
- Click the "Send test message" to have the system attempt to send out an e-mail message and verify that settings are correct.
Hub Settings - Log
The Log tab of Hub Settings is shown in figure 7 below:
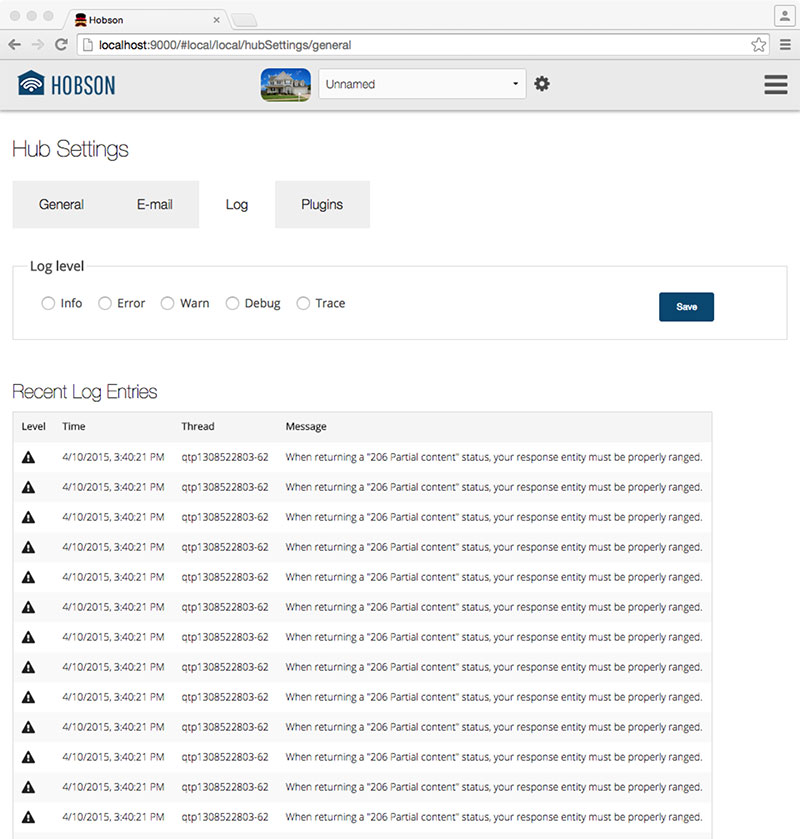 Figure 7
This page allows the user to:
- Set the current log level used by the system (useful for troubleshooting)
- View the last 25 log entries
Hub Settings - Plugins
The Plugins tab of Hub Settings is shown below in figure 8:
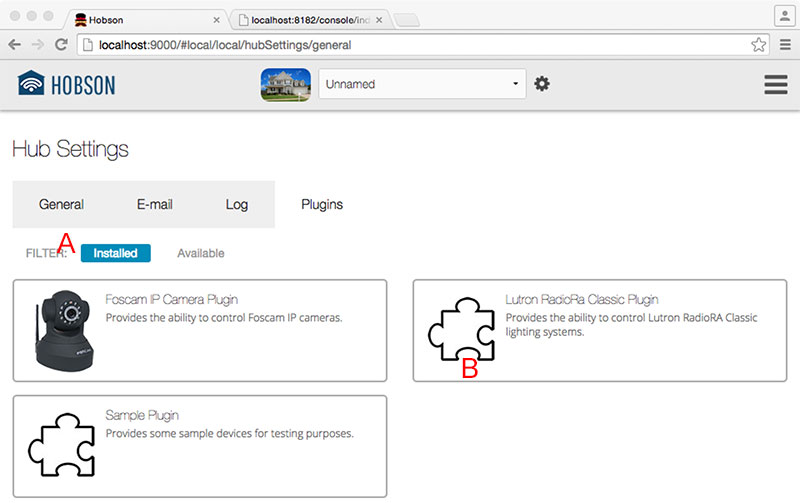
Figure 8
Hobson always has a set of plugins that are installed in the system. As shown in figure 8, the system currently has 3 plugins installed: Foscam IP Camera Plugin, Lutron RadioRa Classic Plugin and Sample Plugin. By default, the plugins tab will show all the plugins the user has already installed.
The user also needs the ability browse and install additional plugins to add new capabilities to the system (e.g. controlling new types of smart devices). Item A in figure 8 is a filter selector that allows the user to filter the plugin list to only installed plugins ("Installed") or only plugins available for download ("Available").
Each plugin in the list is represented by a tile with the plugin name, plugin description and a plugin icon. If no plugin icon is available, a "default" icon will be shown (item B in figure 8).
Each plugin tile needs to expose the ability for the user to:
- Change the plugin settings (TBD) - for now, a mechanism to simply trigger/display a settings form is sufficient.
- Remove/uninstall the plugin (TBD)
- Reload/restart the plugin (TBD)