The Hobson Hub can be installed on Raspberry Pi in two primary ways:
- Ubuntu Snappy Core
- Raspbian
Ubuntu Snappy Core
Coming soon.
Raspbian
Note: This was tested with Raspbian Jessie but other distros should be similar. The "Lite" version of Raspbian is all that is needed for Hobson.
...
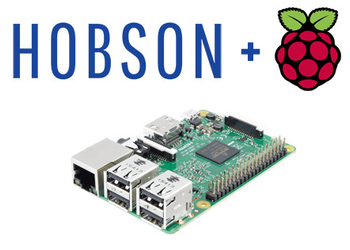
One of Hobson's goals is to maintain a small enough footprint to run on resource-limited devices. For those that don't want to incur the cost of running a full PC or Mac all the time, the Raspberry Pi shown above is a great alternative.
There are some nice advantages to the latest incarnation (as of this writing), the Raspberry Pi 3:
- The bare board can be purchased for around $40 making it a very low-cost option.
- It is extremely small.
- It has built-in WiFi and Bluetooth.
- It is low-power – around 3 watts. It should therefore only cost a couple of dollars a year to run it 24/7.
However, it does have some drawbacks:
- It's only a bare board - think of it as buying a PC motherboard. You'll probably need to buy a power supply and an enclosure of some sort.
Hardware
- A Raspberry Pi 3 (note that Raspberry Pi model 1 and 2 should work as well).
- A 5v DC 2.5A power supply like this one.
- An 8 GB micro SD card like this one.
- An enclosure to keep the Raspberry Pi safe. There are a lot of options here but I've been very happy with the official one.
Software
The recommended distribution for Raspberry Pi is the Raspbian (Jessie as of this writing):
https://www.raspberrypi.org/downloads/raspbian/
There are four main steps necessary to get Hobson running on a Raspberry Pi using Raspbian:
1. Download the latest Raspian image and flash it to an SD card
See the Installing Operating System Images page on the Raspberry Pi site for details. Here are a couple of helpful hints:
- The image file is available for download from this page. The "Lite" version is all that is needed.
- For Windows, you can use the Win32 Disk Imager program to flash the
.imgfile to the SD card. - For Mac, you can use the Pi Filler program to flash the
.imgfile to the SD card. - For Linux, you can use the following command:
dd if=2016-05-27-raspbian-jessie-lite.img of=/dev/sdX bs=4M(wheresdXis the device for your blank SD card).
2. Boot the Raspberry Pi
Insert your newly flashed SD card into the Raspberry Pi and power it up. Make sure the Raspberry Pi is connected to the same network as your PC.
3. Install Java
You can install Java (if 1.7 or better isn't already installed) via the following command:
sudo apt-get update && sudo apt-get install oracle-java7-jdk
...
4. Download and Install Hobson DEB
Download the latest Hobson DEB file from the downloads section and the run the following command:
sudo dpkg -i hobson-hub-0.9.0.deb
Once installed, you can start the Hobson service by running the following command:
sudo systemctl start hobson.service
Using Hobson
You can get started using Hobson by using a web browser to connect to the following URL:
http://PI_IP_ADDRESS:8182/setup/index.html
(make sure to replace PI_IP_ADDRESS with the IP address assigned to the Raspberry Pi)
